2016-02-09

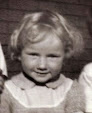
She would be 100 today!

My Mother would be 100 today, and I thought I'd pay tribute to her by sharing some of her patchworks. She'd never call them quilts; they were patchworks after all.

 
Mom never wasted anything, so naturally patchworking would be a perfect extension of what she did, and what she believed. From scraps is the only way she made her numerous blankets. She did her creating on an old treadle singer sewing machine.

 
Dad bought her an electric singer at one point, and although she gave it a try, she wasn't comfortable with the speed of it so stayed with her treadle.


Scraps, not necessarily cotton fabrics got used....
and (horrors - but not uncommon for that time) fortrel also got made into patchworks.  Cutting mats, rotary cutters, and all the marvelous toys and tools we have 
at our fingertips now were not yet created in her time.  
Cardboard templates were cut from cereal boxes as patterns, 
and everything was cut with scissors. 
However those were different times, and.... I think she did pretty well, all things considered.


I see quite a few patterns on her patchworks that I've seen in the blogger world. The appliqué patchworks she made are interesting to me; I can't see clearly enough to know how she did the appliqué. Zig zag stitch and blanket stitch just weren't available on the treadle machine.


Somewhere in between she discovered making potholders, and little aprons for the dish liquid bottles, and I'm sure all 28 grandkids would have gotten sets of these.


The quality of the photos isn't the best, but you can get the idea. 
She kindly wrote the year (made) on most of her photos so that's a great help to me. 
These photos were all in photo albums - remember those albums with the plastic film that you pressed over the photos to keep them in place.... 
only to discover that they were never ever to be removed.....😍
so they're not in the best of shape.

2015-05-22

Reversible Bag # 2

Another Bag; this one, I made wonky log cabin style block from scraps I received as part of a gift, as well as a couple of pieces left over from the place mats I'd just finished.


 Scraps are a Good Thing!!!


2015-05-21

Placemats from my winnings

Back in December I put my name in for this giveaway.... and I was the winner!!! 
.....all the way from N. Ireland!!!

 I've made a few quilts over the years, but had no idea how to use this fabric the best way I could and keep it for our very own.  So I made my first place mats.


I used a fabric I had in my stash for the backing, and we like it as place mats too. 
So... double the pleasure.  
18½"  x 12½"

2015-04-24

Cats in the Bag!!

My first reversible bag.  I added a pocket on the one side just before it was complete..  Next time I'll know better, and add one on each side BEFORE I start assembling it.  Always learning......


2015-04-22

040 Quilt as You Go ~ Abigail & Mark

Quilt As You Go has intrigued me for a while. 
I'd found a tutorial at Little Island Quilting that I bookmarked as a resource; 
her measurements for the strips are what I used. 

I also found another tutorial at The Quilting Edge .  
While I found her instructions very easy to understand, 
the measurements didn't work for me.


I played around a bit with a few different quilting styles on each block, 
some were better than others...but......
Here it is, done and I like how it turned out.


 The back, better shows the quilting styles.


 "A" quilted on a Hummingbird block....for Abigail


"M" quilted, shown on the back....for Mark


 The measurements for the strips (which look like sashing, but are in fact what hold the blocks together) are: for the front 1 ¾" wide, folded in half, and for the back 1" wide.


 The front sashing and the back sashing are sewn and the back is pressed out.


 I had to go to my Juki to sew this seam because the feet on the Janome were too wide, 
and kept pushing the batted layer away which made for a few 'unsewing' seams.


Back to the Janome to top stitch the front.

I really enjoyed this process, and am currently working on a queen sized Dresden Plate Quilt, 
using the QAYG method.  
Measures 59" x 70"

2015-04-21

Circles for Applique ~ How I make them

I've seen a few different ways to make circles for applique 
and have tried a few of them without satisfaction.  
Then I watched a clip on YouTube...and was sold.


 Roughly cut your fabric the size you would like your finished circle to be.


 Draw a circle the size you want your finished circle to be on the wrong side of fabric,.
I use a non adhesive interfacing and pin it onto the right side of fabric.


 Sew on the drawn line.


I then used pinking shears to trim around the sewn line (no need to cut notches).

 
Cut a hole into the interfacing, (careful not to cut through the fabric) in order to turn it right side out.


 Use a sharp(er) tool (I usually use a plastic chop stick) to push out the edges. I found it easier if I pushed on the fabric side, rather than on the interfacing side.


 Looks pretty good.


Turn it over and press.


I've made a variety of smaller circles and this method works so easy!
Done!

2015-04-20

039 Bubble Quilt for Baby ~ henry

It was a request.... my niece wanted a "bubble quilt" for her next baby.  
I'd never heard of it, so I researched it, hm..... interesting technique...   
ok, I could learn something new right??


 This is how it began.  
Making little pillows, stuffing them and sewing them together.


 And they look like this.


 Of course my helper was right there reassuring me, that it was looking good.


 Sewing the backing on, folding the backing around to make a "binding" 
was incredibly tough on the shoulders and arms.


 But alas, it was done.


 I used a light blue fleece (with teddy bears) for the backing 
and did the "tieing" method to hold it place, 
knowing full well that it would be impossible to try any other quilting method. 
I used some of my Mother's embroidery floss to do the tieing.  
so Little Henry has a Bubble quilt with his Great Grandma's embroidery floss in it.  
I'm sure She's smiling!!


 Torture might be a bit of a strong word, but this project wasn't really a fun one, and by the time i was done i NEEDED to do something quick easy & fun, so i put together this receiving blanket to go along with the bubble quilt....... ahhhhhhhh.


And..... how is this for a Thank You???

Scrap Stash Score

I went to a fantastic quilt show in the fall, 
For me it was like an early Christmas shopping trip.
Yes, a few bags of bits and pieces, but many already ready cut 
(ie:  2.25" squares - I think that may have been a mistake) 
and 6" squares & strips, some large scraps the size of a fat quarter, 
and a 7 meter piece of fabric.


all for a few dollars.
I've already had use of a few things here.
Yay to scraps!!!

2015-04-18

W.I.P. Postage Stamp in a Block???

I've started a Postage Stamp quilt a few times, and it's always been put away... 
Then I got fed up with them, and used the parts up in something different.


DH has requested a postage stamp quilt... and in earnest, 
I am working on & gathering 8" blocks of 1" squares ........ 
it might be a while...